There is something quietly magical about handmade Christmas cards. They don’t shout, they whisper. They smell faintly of paper and glue, and they carry time inside them. This little tutorial is for cozy afternoons, recycled materials, and cards that look like they wandered out of a storybook.
Today we’re making gingerbread house Christmas cards using simple cardstock and cardboard. No special skills required, just a ruler, a pencil, and a bit of festive patience.
Materials

-
Cardstock for the card base (green, red, or any festive color)
-
Recycled cardboard or kraft paper
-
Pencil and ruler
-
Scissors
-
Glue stick
-
Eraser (optional, but helpful)
DIY Gingerbread House Christmas Cards
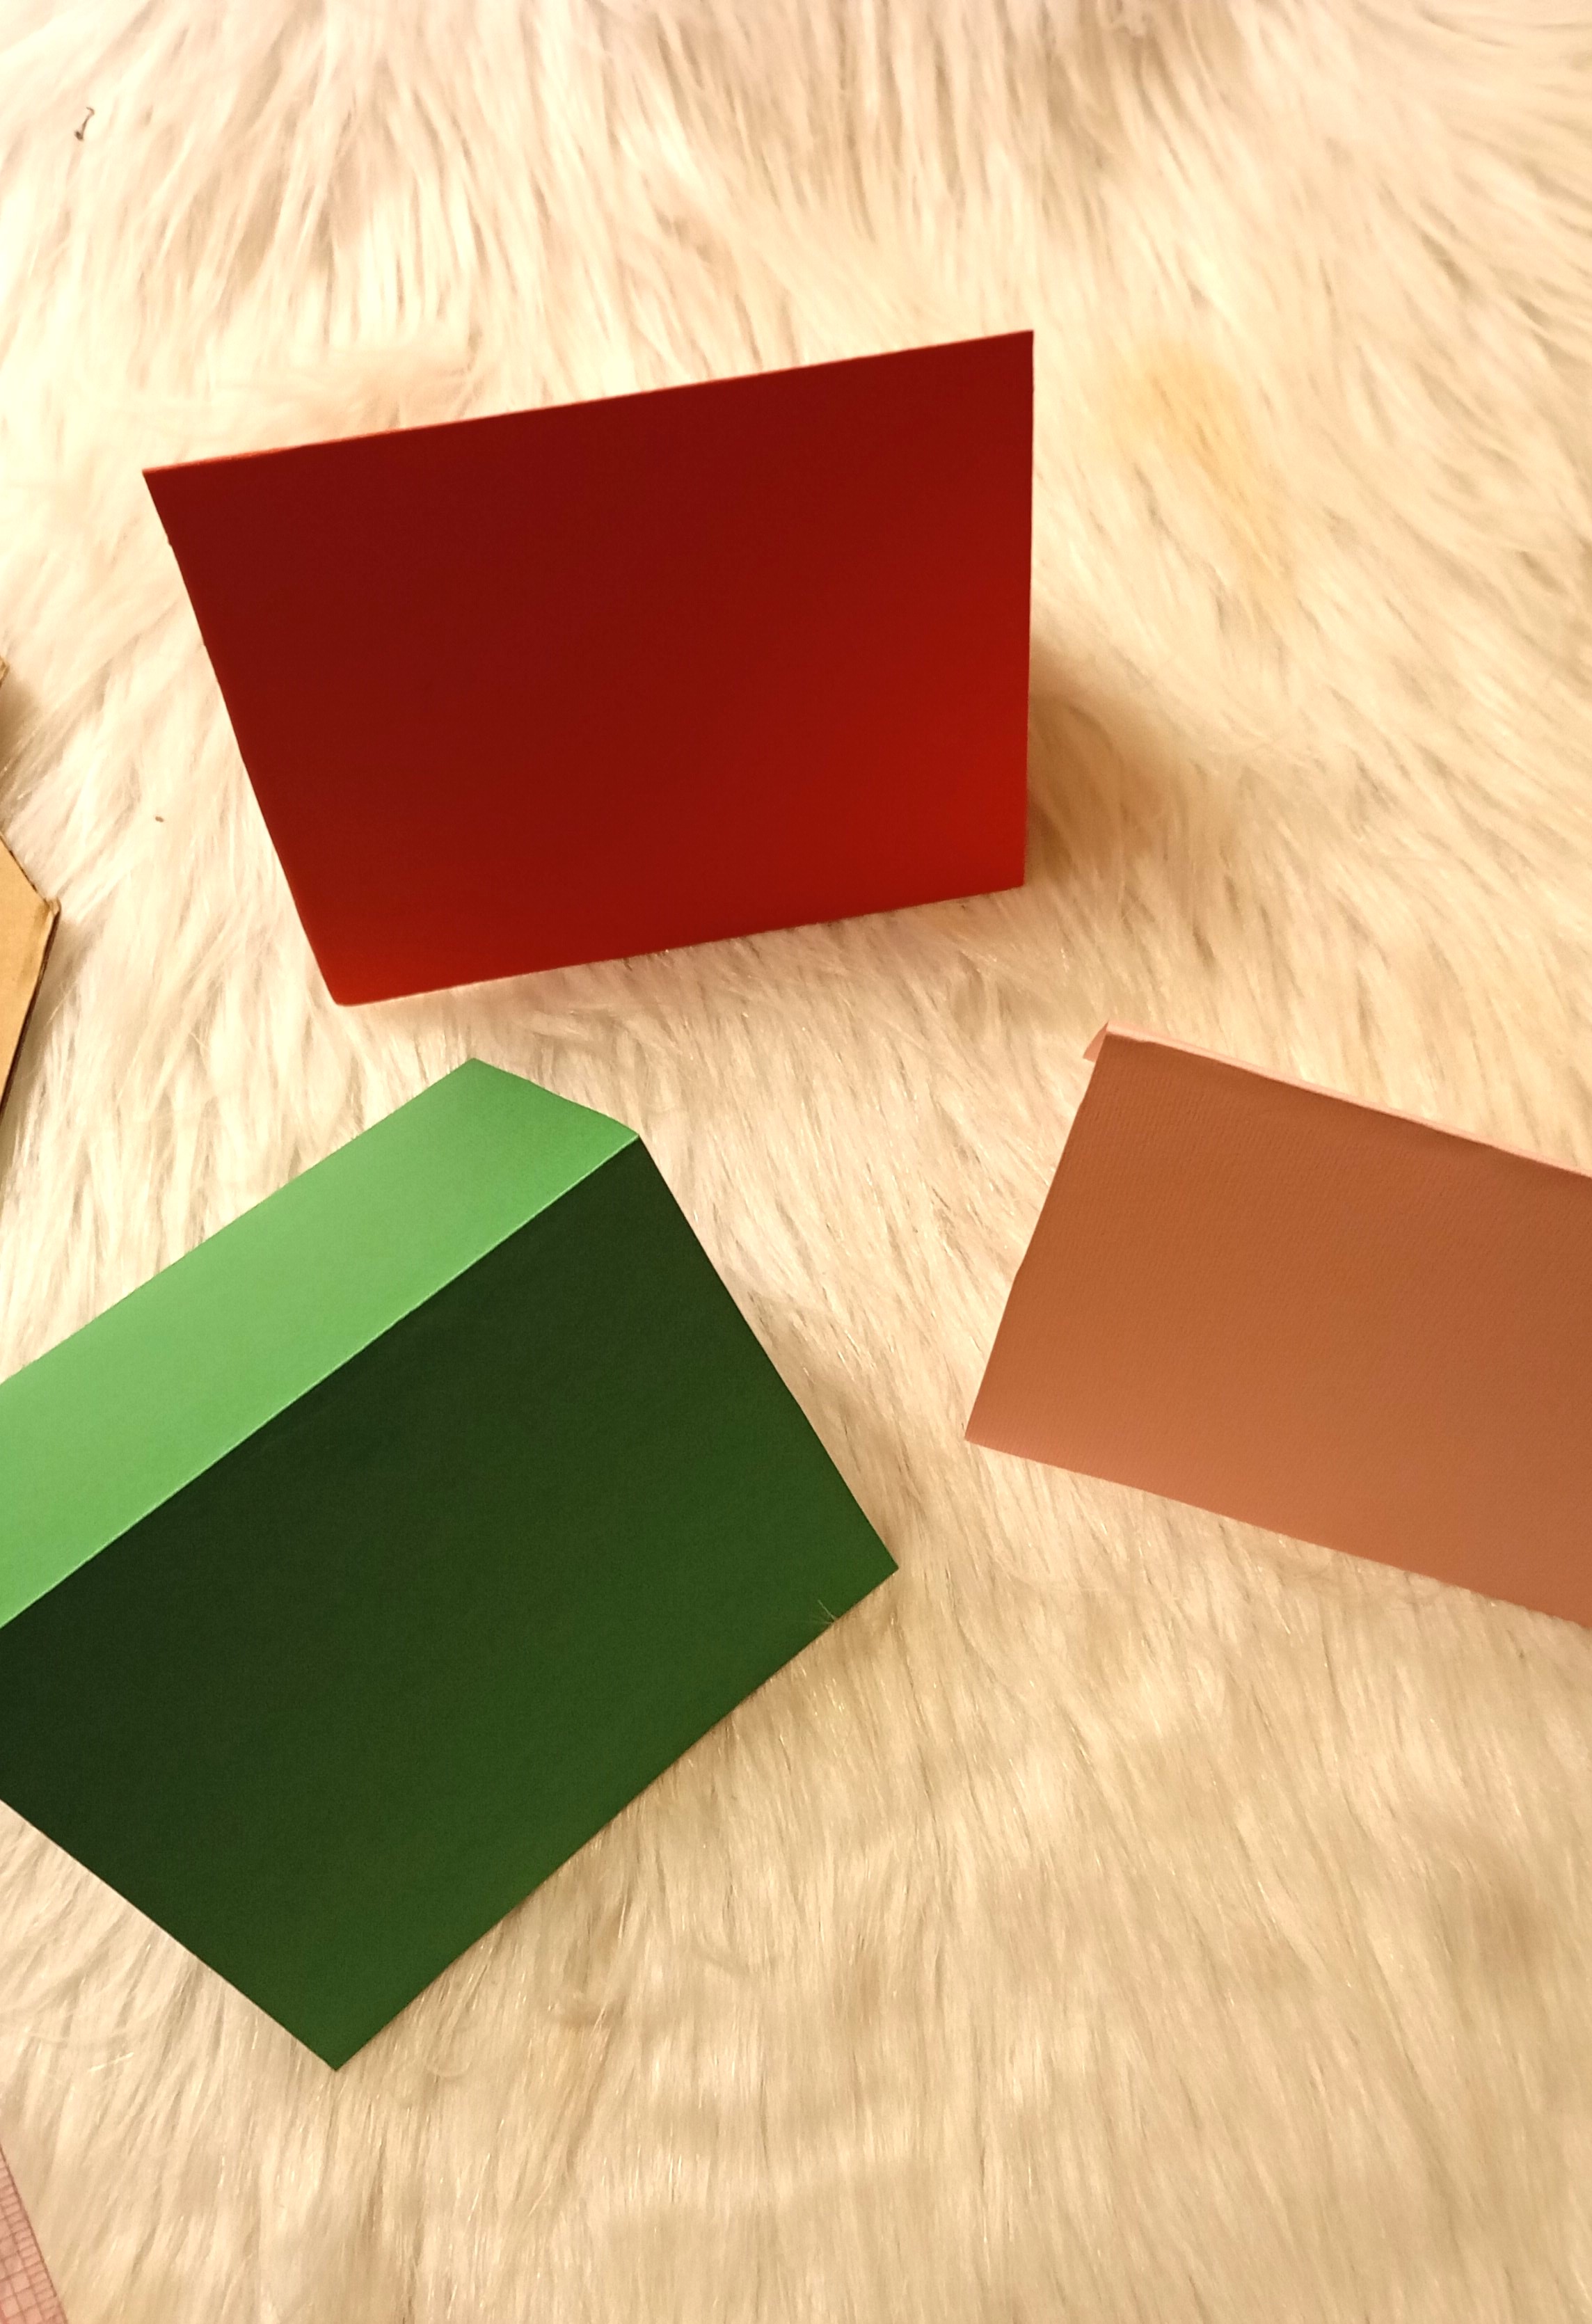
Step 1: Prepare the Card Base
Start by folding your cardstock in half to create the card base. You can choose classic Christmas colors like green and red, or mix things up with neutrals.
Set the folded cards aside while you work on the gingerbread houses.
Step 2: Draw the House Shape
Using your ruler and pencil, draw a simple house shape on the cardboard. A rectangle for the body and a triangle for the roof is all you need. Don’t aim for perfection, slight uneven lines make it feel warmer and more handmade.
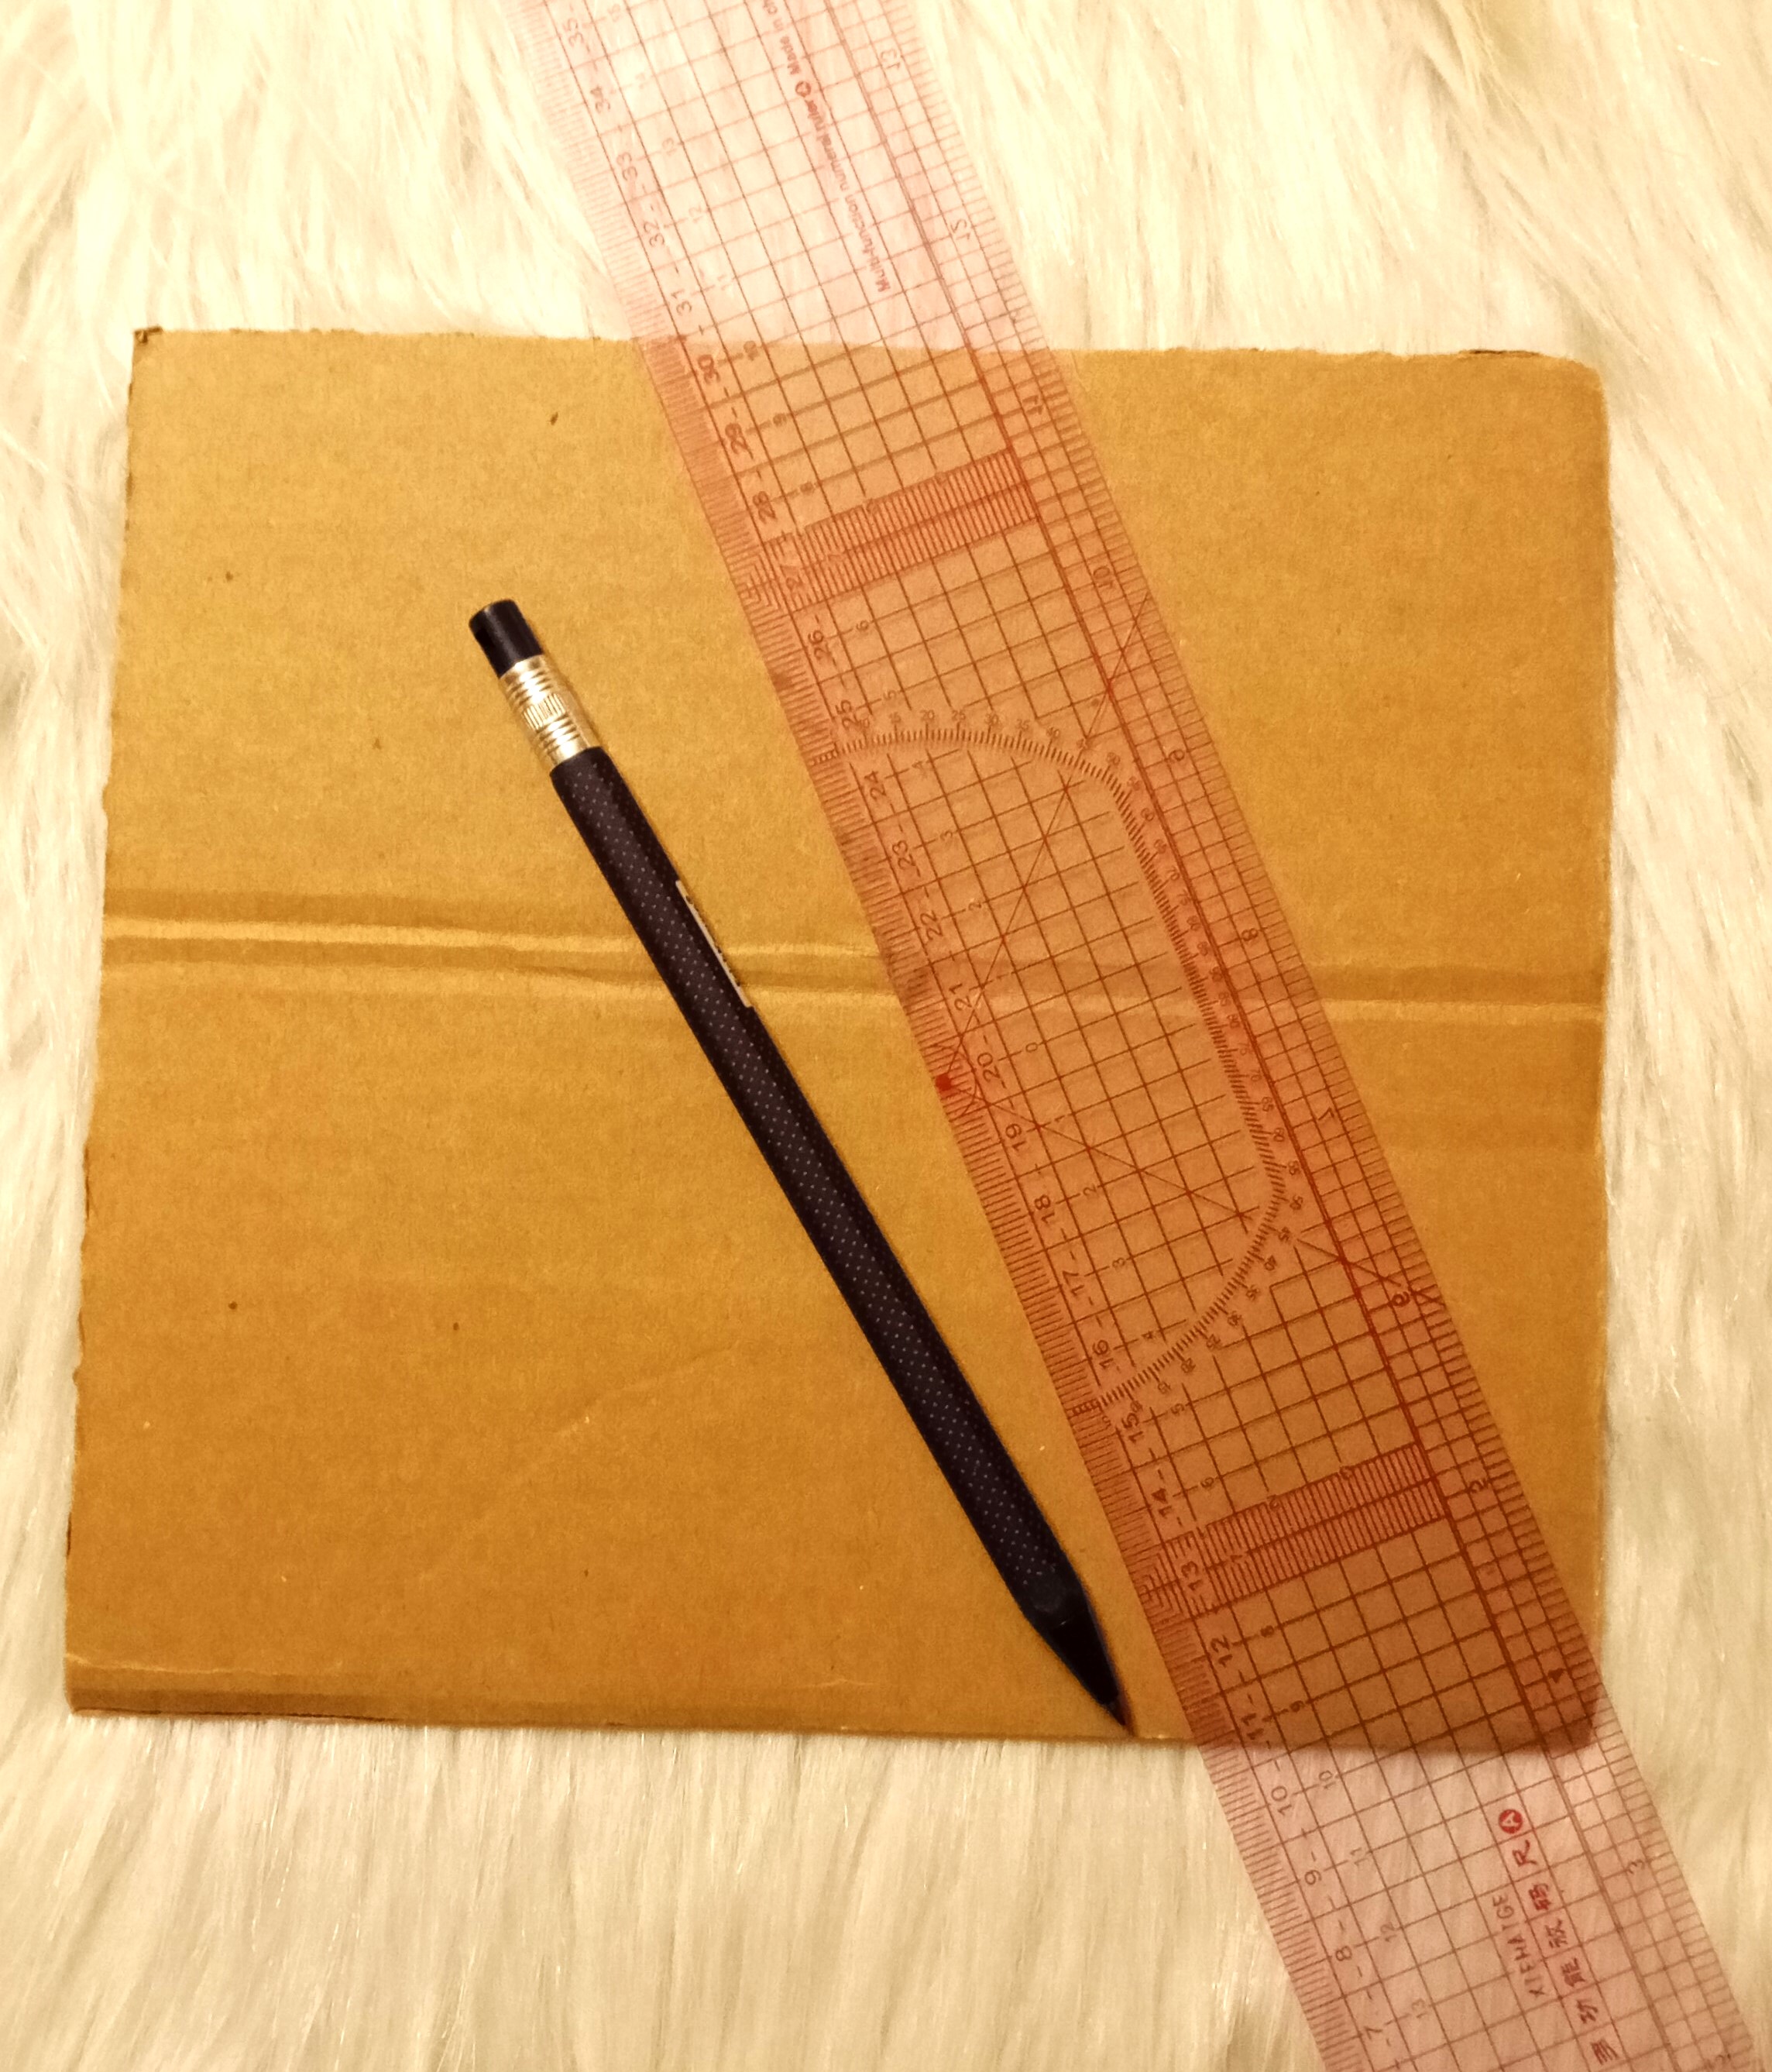
If you want multiple cards, draw several house shapes at once.
Step 3: Cut Out the Pieces
Carefully cut out the house shapes with scissors. You can also cut separate roof pieces if you want more dimension, but a single silhouette works beautifully too.
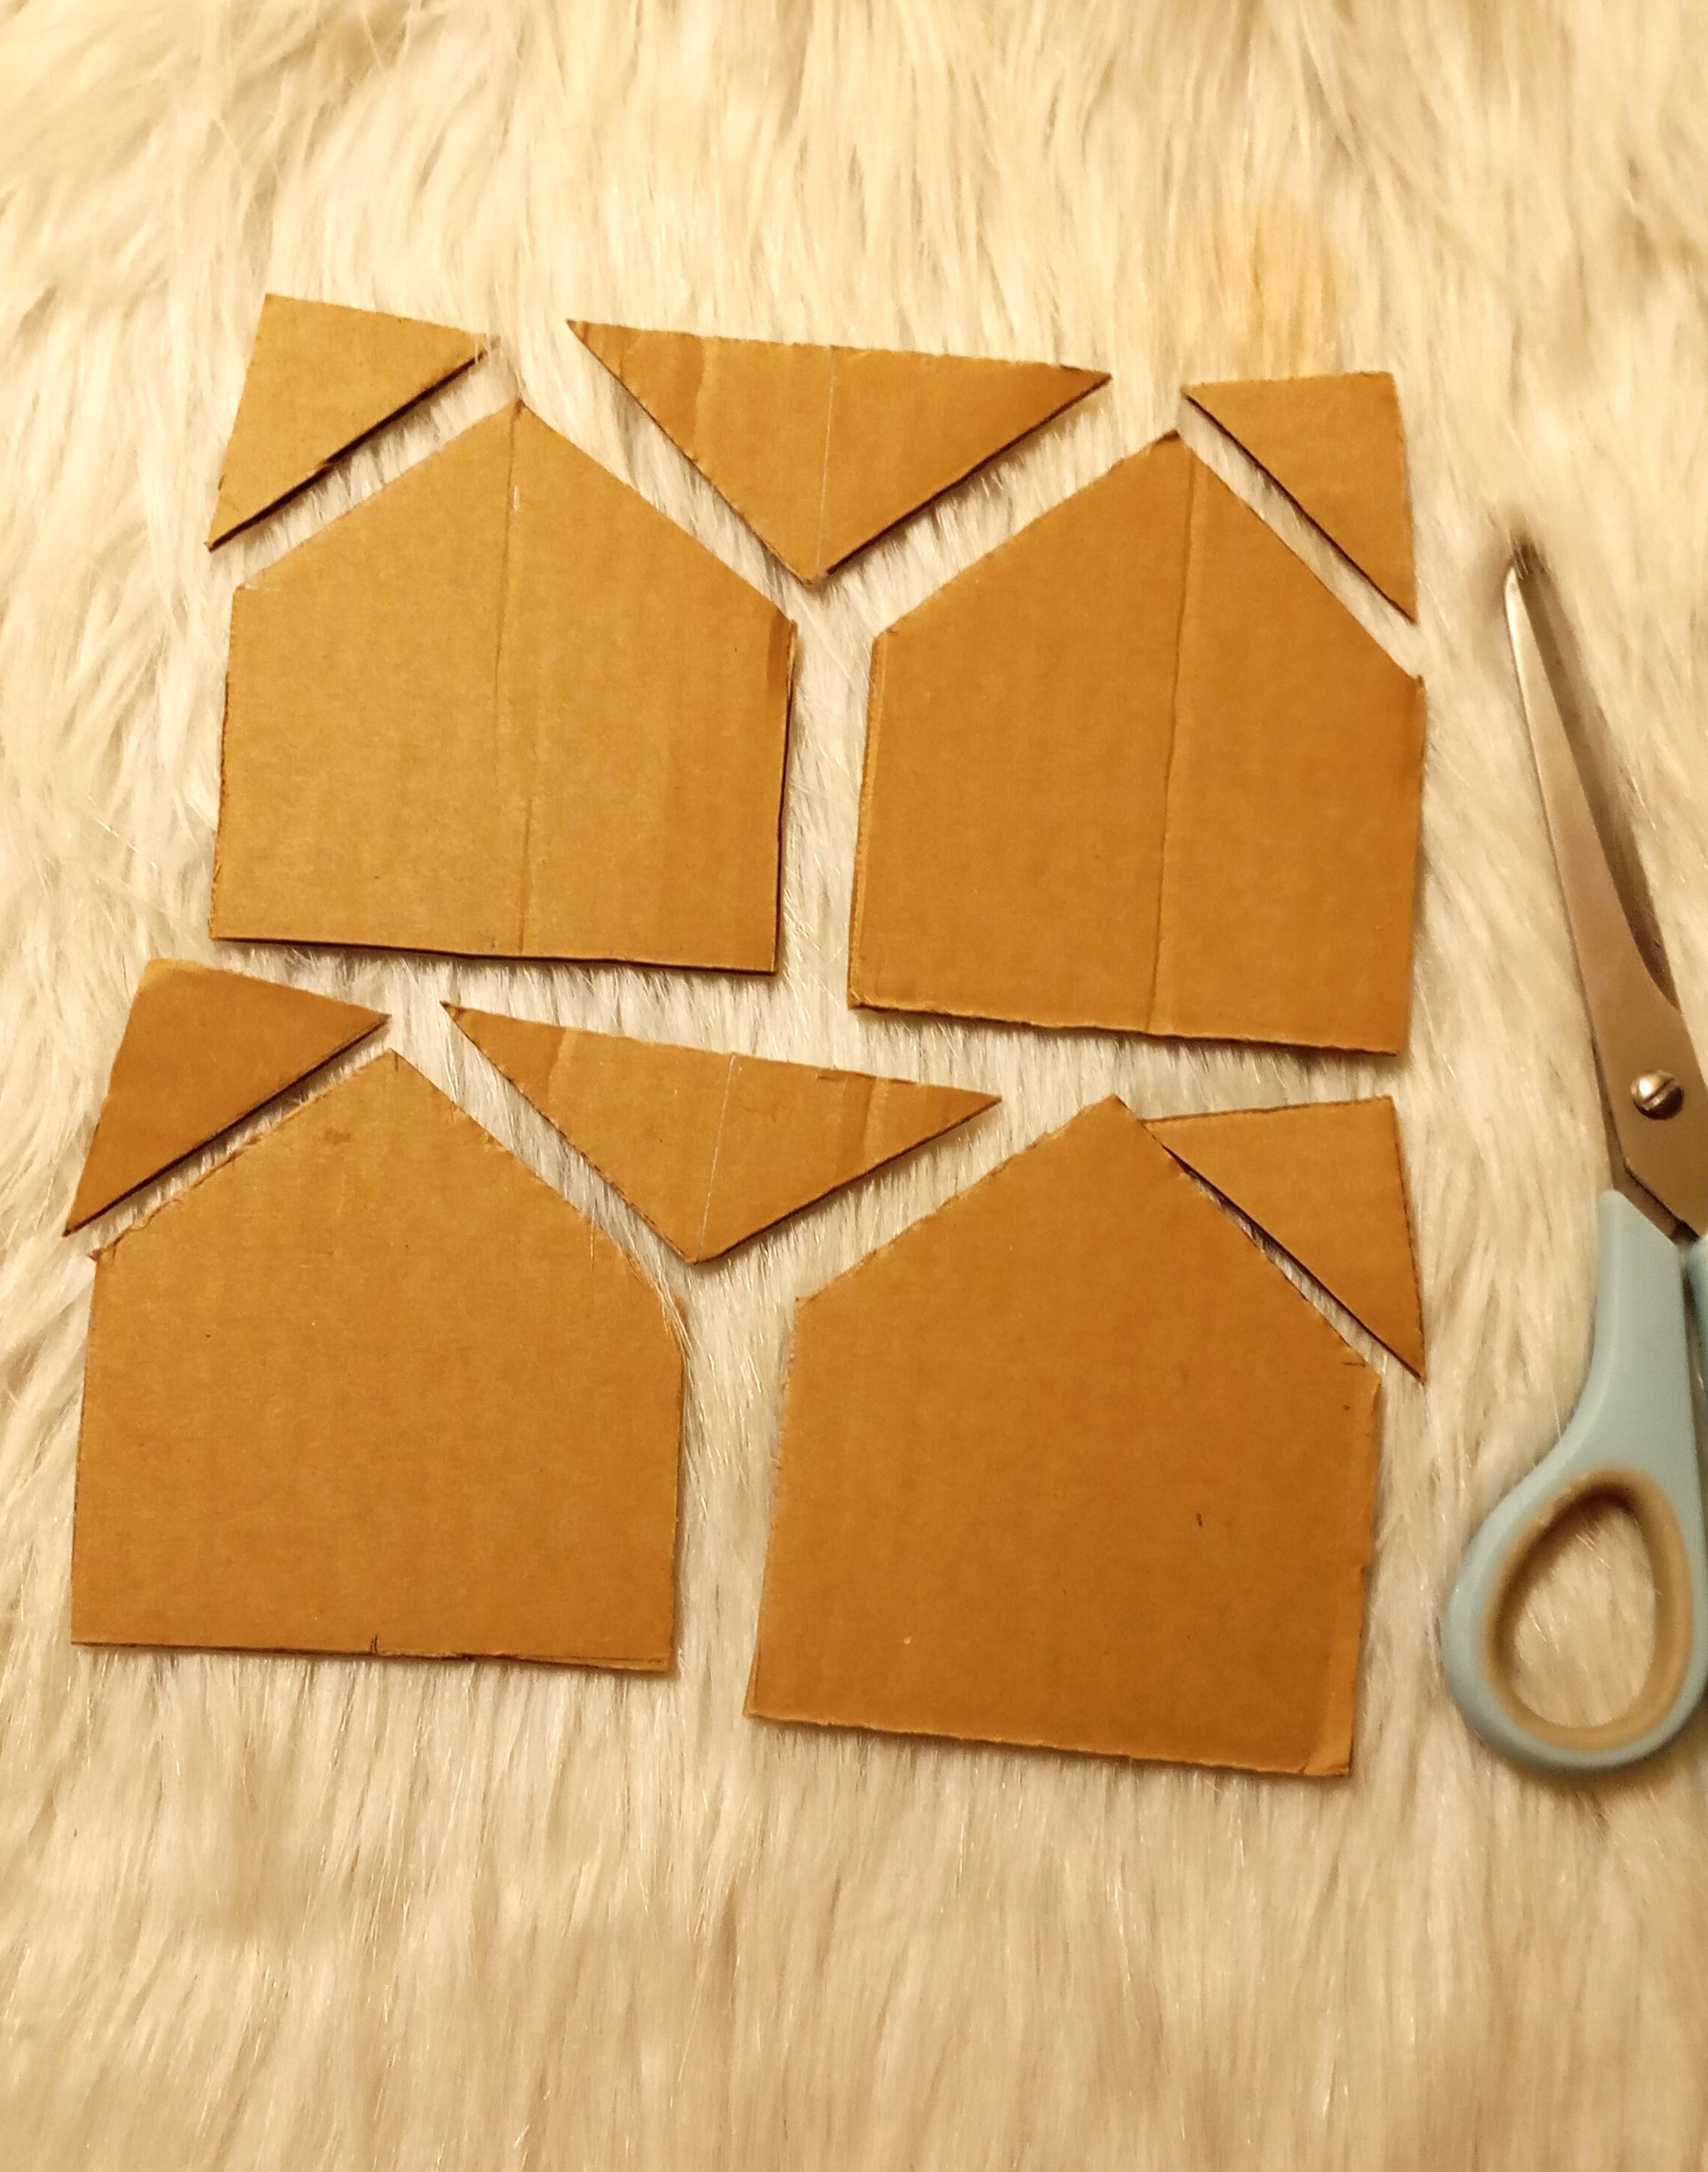
Lay the pieces out and play with their arrangement before committing to glue.
Step 4: Glue the House to the Card
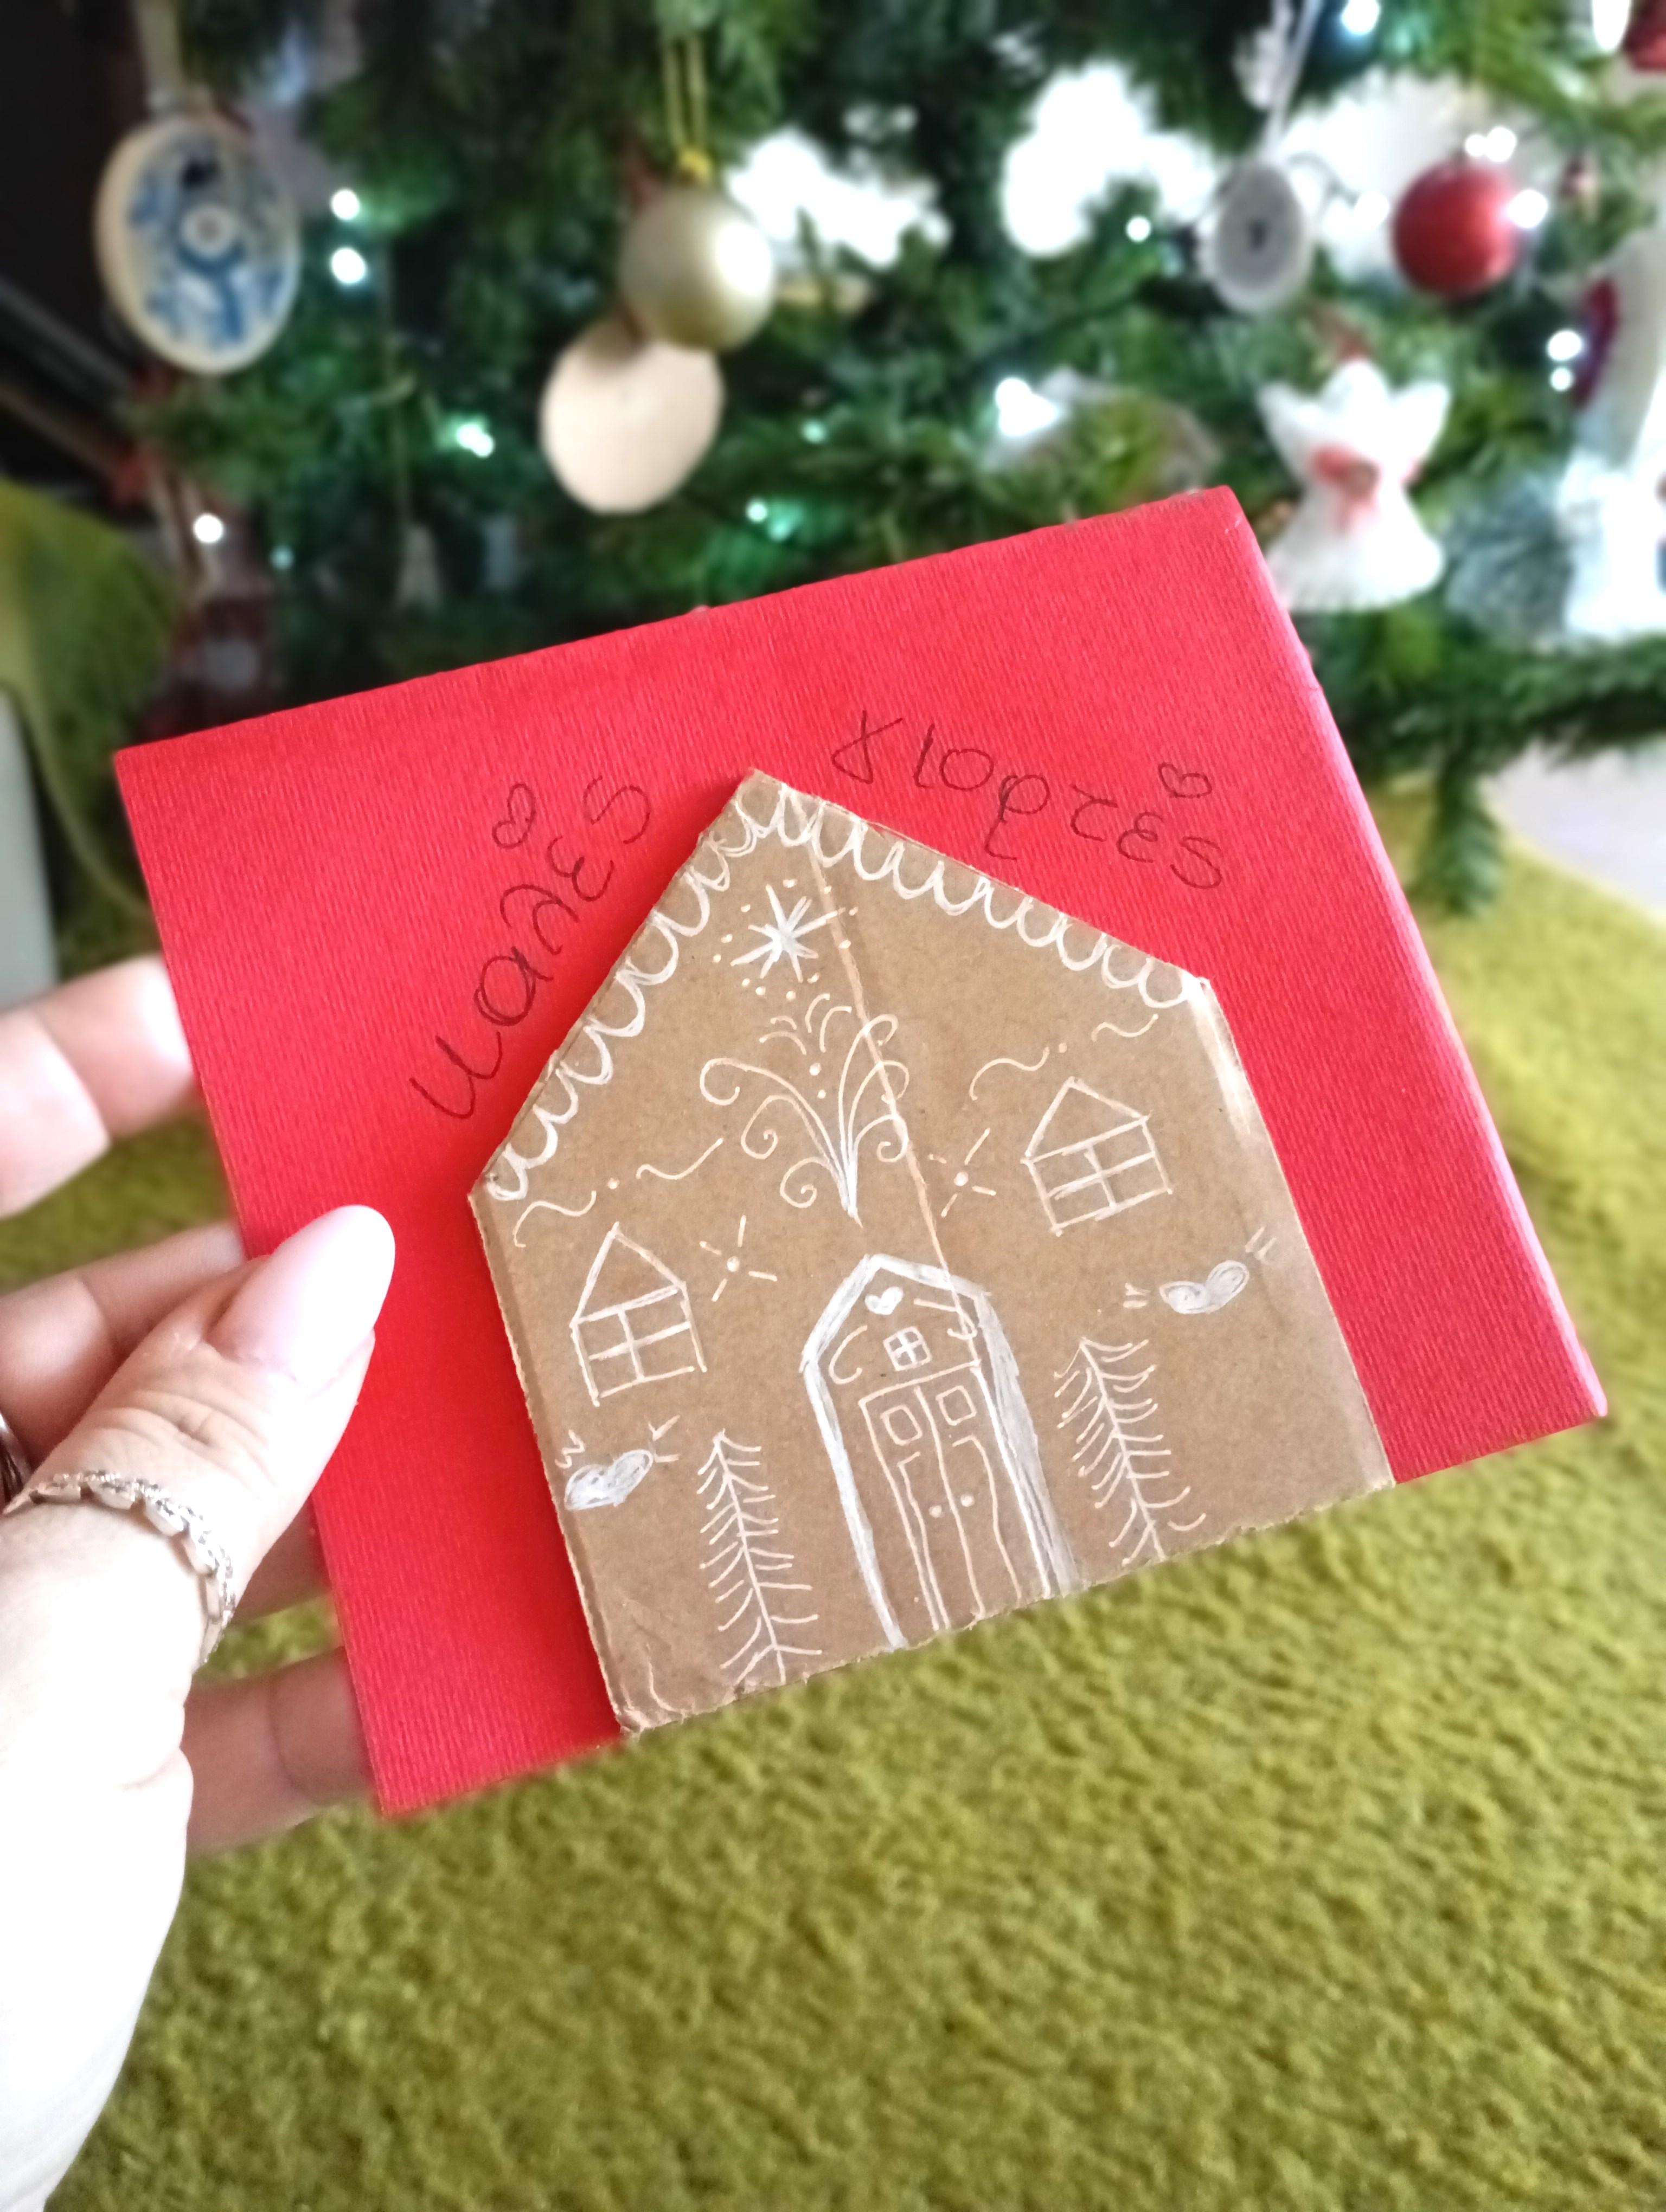
Apply glue to the back of each cardboard house and press it onto the front of the folded card. Hold it in place for a few seconds so it sticks well.
Let the glue dry before moving on to the drawing step.
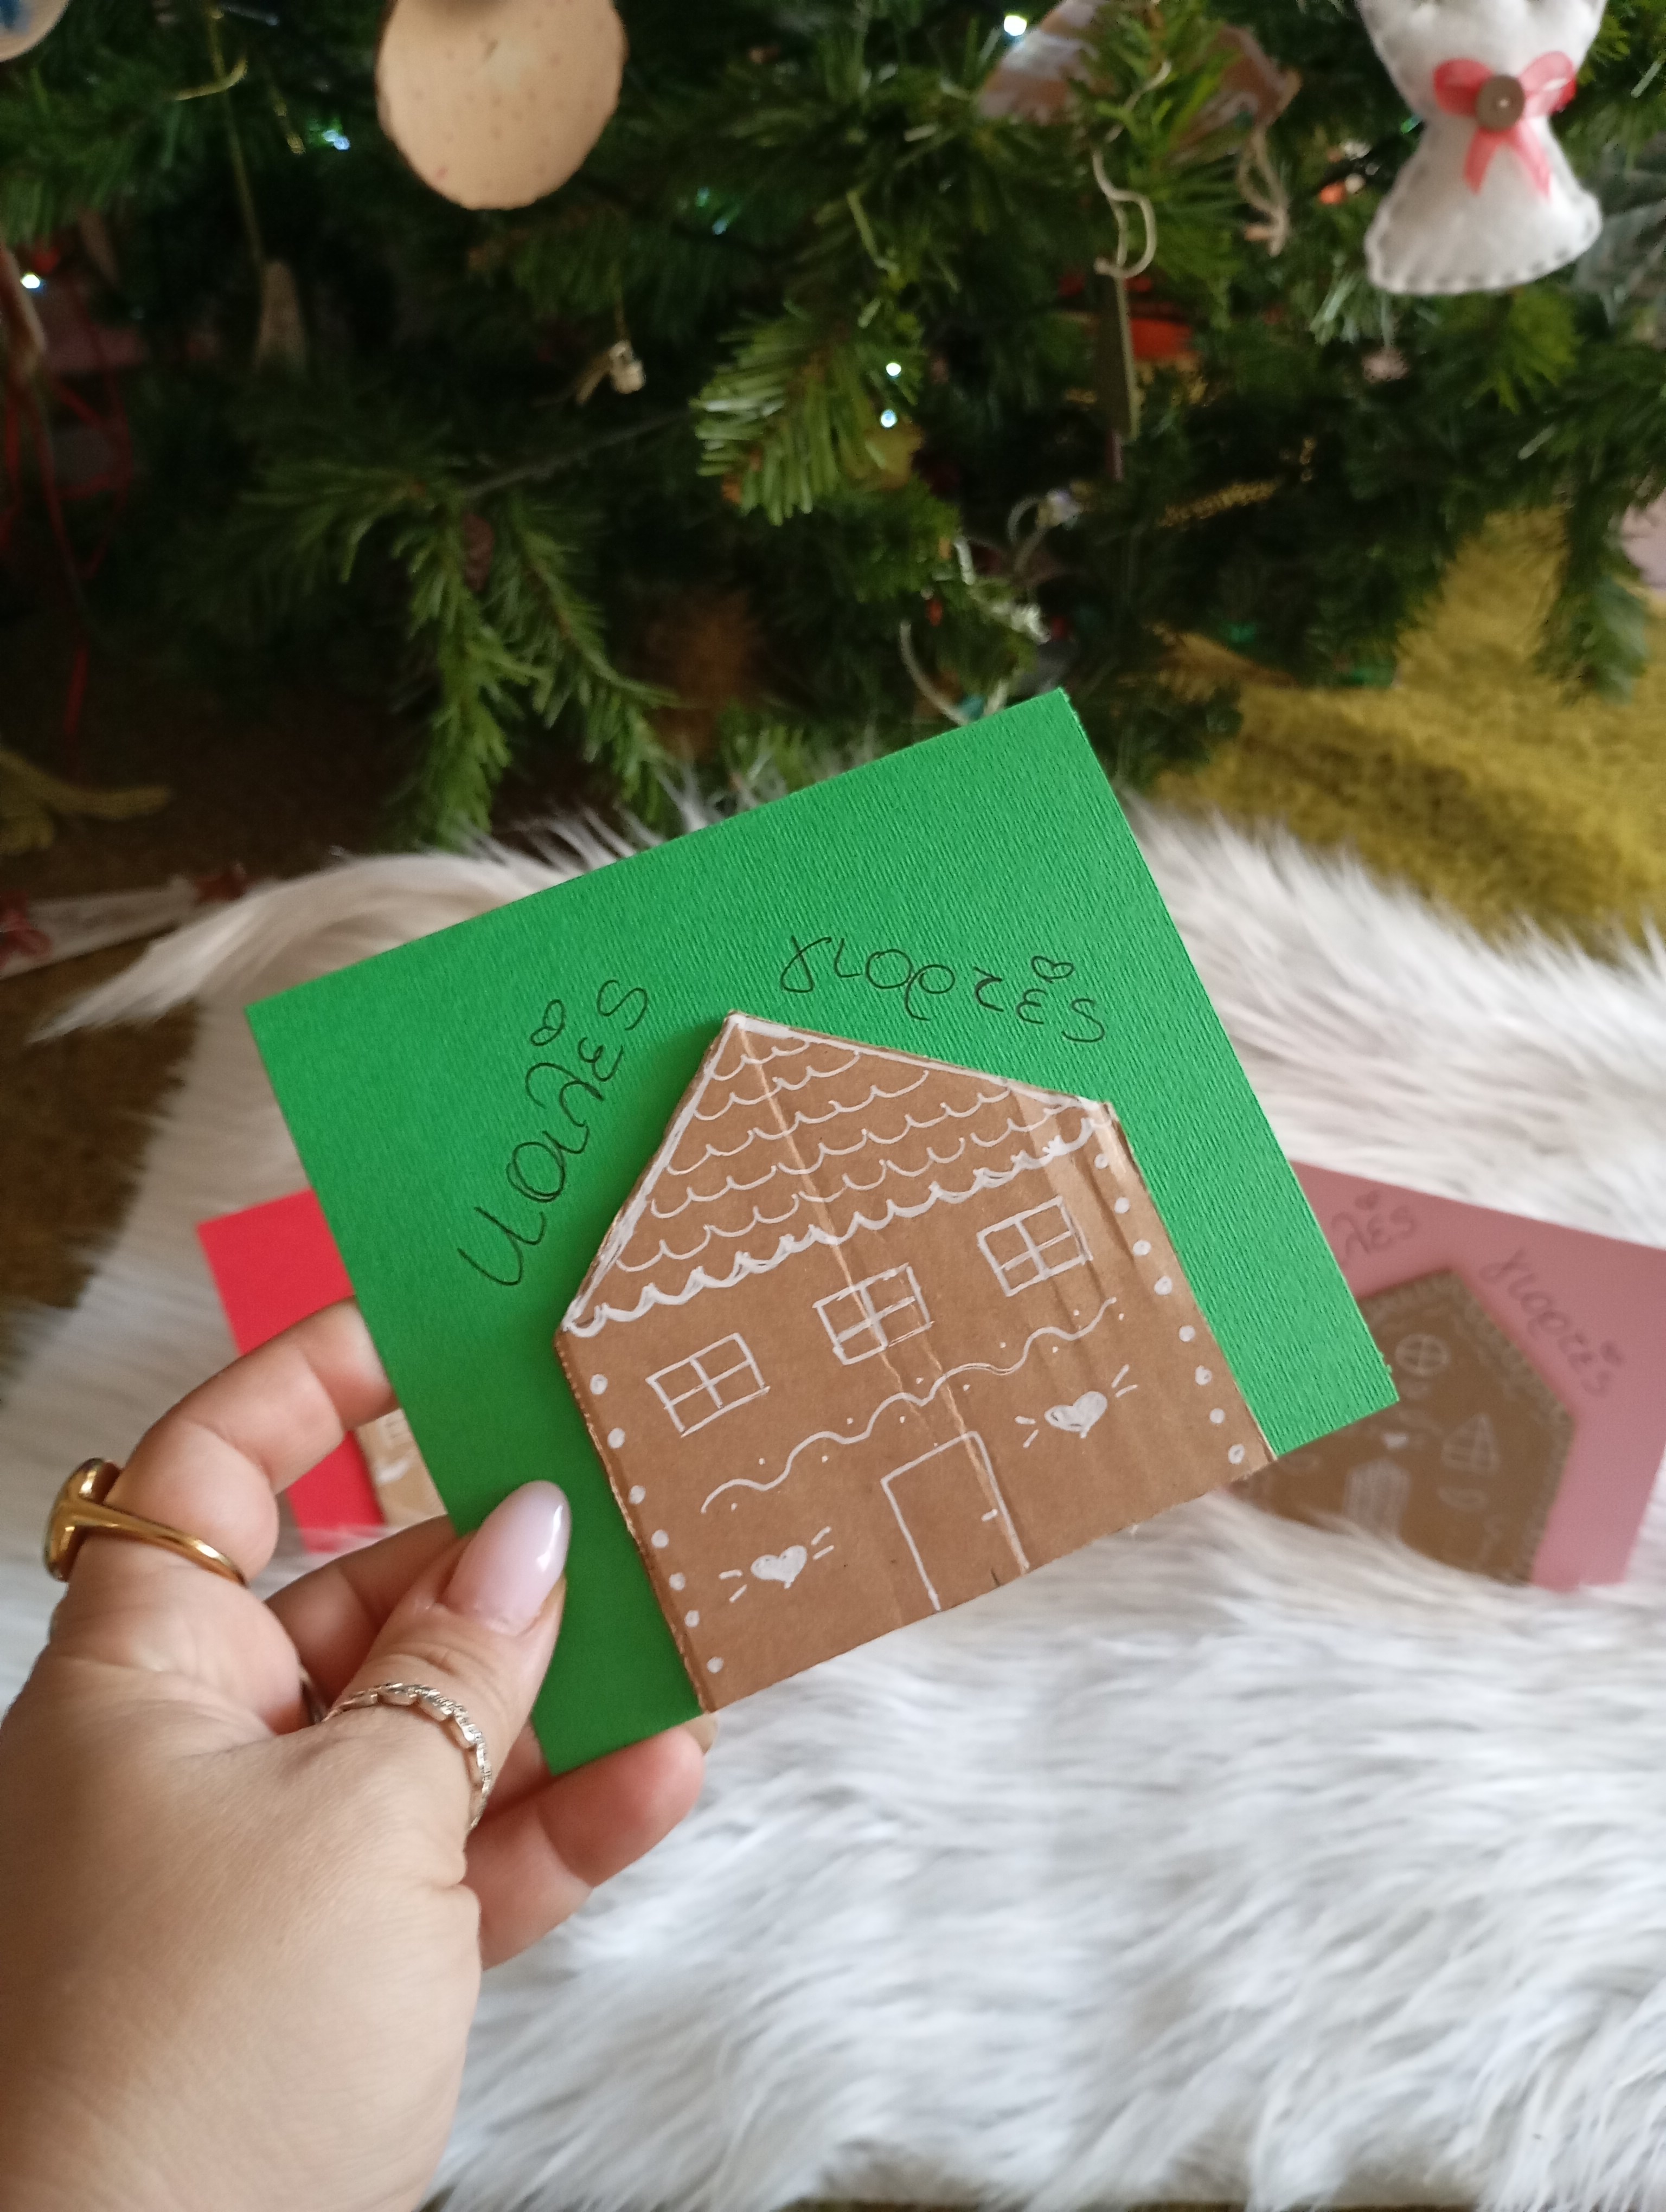
Step 5: Add the Gingerbread Details
This is where the card comes alive. Using a white gel pen or marker, draw simple decorative details:
-
Roof tiles with curved lines
-
Small windows and a door
-
Dots along the edges like icing
-
Tiny hearts or swirls for extra charm
Think of it as icing a gingerbread house, but without the sugar rush.
DIY Gingerbread House Christmas Cards
Step 6: Write Your Message
Add a short festive message above or beside the house. Something simple like:
-
“Warmest Wishes”
-
“Season’s Greetings”
-
“Merry Christmas”
Handwritten text keeps the card personal and imperfect in the best way. I wrote Καλές Γιορτές which is Happy Holidays in Greek.
Finished Cards
Each card will turn out slightly different, and that’s part of their charm. These are perfect for gifting, mailing, or even framing as part of your Christmas decor.
They’re also a lovely project to do with kids, using recycled materials and plenty of imagination.
If you make your own version, I’d love to see it. Handmade holidays always feel a little warmer.
Happy crafting 🎄
FAQ: Gingerbread House Christmas Cards
Are these Christmas cards beginner friendly?
Yes. This tutorial is suitable for beginners and kids, with simple shapes and basic tools.
Can I use recycled materials?
Absolutely. Cardboard packaging or kraft paper works perfectly and adds a rustic look.
How long does it take to make one card?
Approximately 10–15 minutes per card once the shapes are cut.